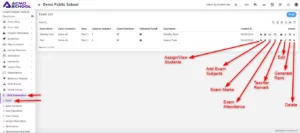
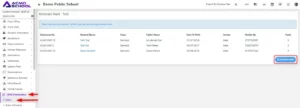
Go to the CBSE Examination > Exam.
The Exam List will be open on the right side.
1. Add Exam
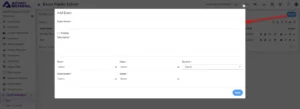
To Add Exam simply click on Add button present at the top right corner, Add Exam model will be open.
2. Edit Exam
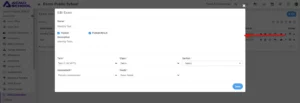
To edit the exam, simply click on the edit (pencil) icon showing at the action column, Edit Exam model will be open.
Note:- 1. Once you have created the exam and added the subjects along with all the related details, you can proceed to publish the exam by utilizing the edit icon.
Within Edit mode, you can check the Publish Exam checkbox.
By checking this checkbox and click on save button, your exam will be successfully published, and it will become visible in the exam schedule for both superadmin and students.
2. For Publish Result, you can proceed to publish the results by utilizing the edit icon.
Within this model, you can check the Publish Result checkbox.
By checking this checkbox and click on save button, your results will be successfully published, and it will become visible in the Exam Results section from students side.
On the superadmin side, you can access the results in the reports module or download the marksheet from the print marksheet module.
3. Assign/View Student Exam
To Assign / View Student on exam, click on the first icon present in the Action column of Exam List.
Click on this icon, Assign / View Student model will be open.
To Assign / View Student model, you can access the student list along with their details.
By checking or unchecking the corresponding checkbox, you can assign or unassigned students for the exam.
After making the necessary changes, click on the save button to successfully assign or unassigned the exam to the student.
4. Add Exam Subjects
To Add Exam Subjects, The second icon is for Exam Subjects.
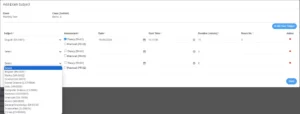
Simply click on that icon, Add Exam Subject model will be open.
Add Exam Subject button showing at the right side of the model, simply just click on this button to open the multiple field for adding subject.
Note :- When you creating two or more exams, such as Exam One and Exam Two, and linking them, make sure to add the same subject to both exams. If you don’t keep the same subject in both exams, the marksheet may appear irrelevant when you print it.
5. Add Exam Marks
To Add Exam Marks, The Third icon is for Exam Marks.
Simply click on the Exam Marks icon, Exam Subject model will be open.
Additionally, you can now see the Enter Marks column where you can add marks subject-wise.
To do so, simply click on the icon corresponding to the subject for which you want to enter marks.
Simply enter the marks based on the students’ performance along with any notes you want to include regarding their performance.
If a student was absent during the relevant exam, simply check the Mark As Absent checkbox located above the input field and finally click on the save button and marks will be save for that subject successfully.
6. Add Exam Attendance
To Add Exam Attendance, click on the icon beside of Exam Marks.
Now click on the exam attendance icon, Exam Attendance model will be open.
First set Total Attendance Days, then enter the number of days the student was present in school and click on the save button to mark their attendance successfully.
7. Add Teacher Remarks
To Add Teacher Remark, click on the icon beside of Exam Attendance.
Now click on the Teacher Remark icon, Teacher Remark model will be open.
The teacher can give remarks to the students based on their performance in the exam and click on the save button and the remark for the student will be successfully saved.
8. Generate Exam Wise Rank
To Generate Exam Wise Rank, beside the delete icon, Generate Rank icon available.
The rank column will be blank until you generate the rank.
To generate the rank, simply click on the ‘Generate Rank’ button located in the bottom right corner.
Once generated successfully, you will be able to see the rank in the rank column.
Note : – This rank will show as exam wise and you can also check this rank from the student side CBSE Examination > Exam Result.

